Wednesday, September 9, 2020

Regency Short Stays, Dress and Spencer

 Update.......


They are finished.  I shortened the shoulder straps and sewed on hook and eyes down the front. 


I want these to be something I can put on myself.  There's nothing worse than having to have help to get dressed.


Unfortunately I used the wrong hooks. They were all that I had but they are not at all suitable.  I can get 1 or 2 hooks done up but as soon as I go to do up number 3, number 1 will undo or 1 and 2 undo. It doesn't matter if I start at the bottom or the top edge.


Solution......remove the hooks and replace them with some that have a lump in them. The lump helps stop them coming undone.  Thus will mean a physical trip to my local sewing centre - not a trip I can do atm as, well, covid lockdown.


The dress I made went together quite well. The pattern called for inter lining as well as lining.  I only did the lining in both the bodice and the skirt.  I used a purple print poly cotton fabric with white satin lining. It also uses ties at the back that are threaded thru casings. Again, I want to be able to dress myself so I did not do the casings.  I installed a zip up the centre back.   This needs replaced......the type it is requires the zip tab to be locked down otherwise it just opens extremely easily.


The Spencer I am happy with. I used a plain purple polar fleece and lined it with white satin. I did shorten the sleeves before I realised the cuff is supposed to be folded back.... oops.  But they finished the right length to  my wrist. So if I fold the cuff back they become 7/8 sleeves. This is acceptable to me.


I have more plain poly cotton fabric in a purple to make another dress, this time with long sleeves. The print dress has short sleeves.  Not too sure at this stage if I want to make another dress the same,  make the other one in the pattern  (the neck line is a bit different) or try to work out how to make a open front bib style. I dont have a pattern for this. If I did the bib front style I think I will be able to dress myself easily....


I have also made a cream chemisette which is basically an under shirt that only goes down to your waist. I used a seamwork dress pattern, only did the bodice part and left the side seam open where the zip would have gone. Going to put ties at the side but it fits and looks nice on.


When I get all these issues sorted I will pop us a few pics for you all.

Friday, September 4, 2020

Making Regency Short Stays

As part of my making of some Regency styled clothing I had to think about underwear. Whilst knickers are not a problem a bra might be. Modern bras usually cover more of ones chest than a Recency dress allows for, even with an under shirt (chemisette).  I dont really want to wearing my new dress out on public and have my bra on show, even if it is a lace one. 


After a bit of research I found a couple of pattern ideas that might work as short stays.


What is a short stay, you ask?


Basically they are the Regency era equivalent of a modern day bra.  No hooks and eyes back then so ladies were actually tied into their stay.


Think of a bustier and you get the idea. 


My first attempt might work, eventually. I used a bather/swimwear pattern for the bust section and added extra at the sides as well as a back piece.  I want my stays to do up in the front so I dont have help in getting dressed. They are a bit too flimsy at the moment to decide if they will work in the end.


I then had a look for something else and came across what is basically a rectangle with some  'vee' inserts in the top edge. Others have made ones along these lines and they seem to work.


I measured my underbust and my actual bust to help with what I had to cut out. I also measured the depth of my bust.  This is what I have so far.....


I will make the loning the same as the front and will add heavy interfacing to the bottom band and up the centre front and I will use lighter interfacing in the straps.  Once together I will sew on hook and eye closures down the front, but I think it will work. It still looks kinda flat across the top edge though. I need to put it on and check the fit.


Saturday, August 15, 2020

Dresses and Changing up My Style

 I class my clothing style as eclectic.  I like to wear jeans or leggings with tee shirts as well as wrap around skirts in sari silks or fitted 50's style dresses or straight knee length skirts.  If you were to go through my wardrobe you would find all styles if clothing in all sorts of colours.  About the only thing I don't have is button up shirts.  For months now I have been scouring the rabbit hole that is Pinterest and have been enamoured of clothing by Ivey Abitz as well as regency style dresses. 


I like the layered look of Ivey. It is loose and flowy yet fitted at the same time.  As a post menopausal woman with a thickening waist (ugh!) I feel it is a style that would suit me.  The OBI style belts give a bit of waist definition; the skirts and dresses seem to have room to move and be comfortable; the jackets and coats offer that extra layer of style and should be able to be quickly removed when the need arises.


Regency style is, to me at least, similar to Ivey Abitz style just with a higher point from which the skirt falls from.

I have recently purchased some fabric and a commercial pattern online (waiting waiting waiting) to make myself 2 regency dresses and a short jacket (called a spencer).  One of the fabrics is a plain purple poplin and the other is small floral print that should also be in purple tones.  The jacket fabric is a fleece in purple.  I am going to line the skirts of both dresses with a fine satin as well as the whole jacket. One of the dresses I will do as long sleeves - it's still winter here and I would like to wear it soon.


I already have some fabric to doctor up some Ivey styled clothing - I can't afford her stuff and she is on the other side of the world to me. I have numerous pdf patterns that I think will work for this - I think I just need to stop procrastinating and pick one and go for it.


Being Green

Warning ***** Possible Ick Factor Post *****


When I got dressed this morning I noticed that I was down to 2 panty liners. Drat, I knew there was something else I wanted to put on my shopping note!

For some time now I have been thinking of making re-usable panty liners. They make sense to me on an environmental point as well as a money point. The ones I have been buying have changed over recent years (or maybe my body has changed) and don't seem to hold together as well as they used to.

I had also thought of adding a couple of layers to all of my underwear instead.  That seems like a lot of work. Note that I am talking about liners - not menstrual pads as I don't need those anymore.

A quick search of the internet and I found a lot of people have tutorials on how to make these things. I had a look at some of them and decided to follow instructions from It's Not Easy To Be Green.
Hers seem to be most nice looking, professionally made item. Some of the others just cut out the shapes required and zigzagged or overlocked the pieces together. I found 1 where there was a pocket so you could add extra absorbent layers, great idea, but the open part was against your body and I wonder how that would feel. but as I said, I don't need that much absorbed.

So I went and bought some polar fleece and some soft cotton flannelette and started cutting.  I decided I would only need one layer of each of the fabrics.  I made 2 to start with, cut to the pattern size, and just zigzagged the edges of the 2 layers together.  The cutting was the hardest part - going around the curves.  I had purchased some plastic snaps and used those to hold these things to my knickers.  They work for their intended purpose but I felt they were a bit narrow.

A couple of days later I widened the pattern a bit and made more.  These I feel are much better.  I stuffed up 3 when putting the snaps on - 1 part of the snap was caught in the application tool and now the snap doesn't really hold on one liner. The other 2 I put the snap on the wrong flap.  I still wear these ones though. They wash up well and even go through the dryer.

On Refection:  After using these for a few months now I think they are ok. They do slide back during the day so I will either add an extension to one end or make more. I am surprised how I don't really notice them like I thought I would. That may be because I wear pants a lot and maybe I will notice them when I wear a dress.  Only time will tell.

If you are on the fence about this sort of product, don't be. Jump in and get yourself some.  


Thursday, March 28, 2019

Pattern Test

The pattern has finally been released, so I can now post this..........


About 2 weeks ago I was chosen to test the new Josephine Jumper by Rebecca Page.

After a few issues with facebook and getting accepted into the group they set up for it, I finally got to download the pattern and instructions.

25 pages of instructions and 29 pages of actual pattern later and I had something to work with. I drafted off the size I needed (XL) then picked my fabric - a floral knit. I did think of using a stripe but there was slightly more of the floral.

Laying out the pattern pieces I notice the grain line on the front is perpendicular to the back - what the.....

I decide to just go with it as my fabric is not directional and has 2 way stretch.


Sewed the front 2 bits together - I now have a piece of fabric that is about 1.5m long that I have to attach to the back. The fabric is slippery and drapey and just won't stay still.


So I have one shoulder seam sewn and now I have to twist the front over one full circle to sew the other shoulder seam.  Ok that's easy.

Not adding sleeves even though I did cut them out. I decided a top/jumper with floral sleeves is not a good look.

Found my marks to clip where indicated.  Hemmed where told to (after hemming the wrong side and unpicking it).

Moving on to attach the cowl to the back of the neck.  UUMMMM.  The written instructions do not make much sense.  Now I know how the Cali Mums feel.  Thank goodness for pics in the instructions.

Follow the pics, get the back neck sewn.  Wait - my clipped marks do not match up!  Post pic and ask question about if they should.  Get different answers, some saying fabric has stretched, some saying there's was the same.  Decided to just extend the seam to the hem. What else can I do.


On the home stretch now.  Hemmed the bottom edge and the armholes.  Yay! Finished.

Now to put it on to see if it fits.  It's a twisted up puzzle (I won't say mess) to put on.  I had to find the back of the cowl seam, use it find the shoulder seams and then the armholes, slide my arm into one armhole and then across to the other armhole.  I put it on a hanger to see how it looks.  Oooh, I think I like it.

Pop it on and head to the bathroom with my camera.  Urgh - need to clean mirror and clean up bench.  That's done.  Take front facing selfie in the mirror, take side facing pic in the mirror.  Decide I can't take a pic of the back with this camera.  Also decide I need someone else to take these pics for me.

Upload the front facing pic to the testing group with a promise of more to come.


I like the fit, just not the amount of fabric at the back of my neck (but I did make it on a warm autumn day).  The admin for the group comments on my post saying "ooh I love this on you". I feel quite please with myself.

24 Hours later and it seems I made a booboo.  I chose the size according to my upper arm measurement, not my hip measurement. Doing so would have meant I was to make the 3XL which is a full 8 inches (20cm) wider all around.  As this is my first test for anyone I put it down to newbie eagerness.

So now for the final make I suppose I should make the larger size. I was planning on making it in a grey cotton lycra, but I am not sure I would wear it with such a loose fit.

The item is described as a relaxed fit that is super comfy, sporty yet elegant.  A lot of the pics I have seen show garments that, to my mind, seem to be too big on the wearer.  Some of the wearers have even stated they feel theirs is too big, others have liked their make.

Sitting there typing this up I am thinking I might make the larger size as per the instructions, post up the pics of the final garment like a good girl.  Then when it's over run it in to the smaller size.  Though maybe the cotton lycra will behave differently to the floral polyester knit used as the first test make and I will like the final make.  Time will tell.

Mind you I did ask if there would be some adjustment to the pattern/instructions between the first and final makes that we had to accommodate - I didn't get an answer.

Thursday, February 14, 2019

Pattern Testing Update

Opened up my email this morning and saw this......

"Dear Joy
Thank you so much for applying to join our Tester Team! We’d love for you to join in on all the fun.

Keep an eye out for the next call and volunteer when you’re interested!
We are so excited to add you to the team!"

Yay! I can't wait to see what the first item will be.

Now to get my machine serviced and my scissors sharpened.

Saturday, January 26, 2019

Pattern Testing

I just applied to be a pattern tester for Rebecca Page, a London based clothing designer (she designs other things too).  If I get accepted I will be making something for me every 3 months - yay me-made clothing!  I will just have to slot it into the schedule.

Here's hoping.

oh, this is her blog.....  https://rebecca-page.com/blog/

Wednesday, August 2, 2017

Sewing for me

After spending months sewing for other people i feel it's time i did some sewing for myself.  I have some fabric I would like to use and an idea that I am going to give a go.

The idea is to sew each of the garments that the blogger of It's Always Autumn has made and put up patterns and tutorials for. She has t-shirts, long sleeve tees and a few different dresses that I quite like.

First up will be a long sleeved tee in a grey stripe knit. This is the base pattern with added long sleeves from which the dresses are made.  It's still winter here and quite cold for Melbourne so I think this will be a great start.

Wish me luck!

Saturday, April 22, 2017

To Market, To Market

Going to a local Makers Market next weekend - no not buying a fat pig.

I will be taking my hand knitted shawls, scarves, cowls and headbands as well as some framed embroideries, some hand beaded satin bags and a few crocheted wash cloth sets.  Oh I wil also have a couple of NCWs and two Zipper Wallets.

After the market all that didn't sell will be re-photographed and put up for sale on both my facebook page as well as on my Etsy store.

Here's hoping I don't have to take lots of photos.


Tuesday, April 11, 2017

Beanies, Hats and Headbands

I have just put up a short video of the beanies, hats and headbands I have on my facebook page.
Pop on over to have a look.
They are all up for sale.

Here's the link:
https://www.facebook.com/Crafting-Joy-735952479816685/

Monday, April 3, 2017

Name change

I have just changed the name of this blog from Joy Belle to

Crafting Joy

to align it with my facebook page of the same name.

The intentions is, once I finish coordinating, designing, sewing costumes, that I will attempt to increase traffic to both this blog and my fb page and improve sales of the items that I make. 

I feel this is a good way to go about it. 

Wednesday, October 5, 2016

Start of something new

I have been thinking of setting up painting classes at home - something a bit fun for participants and pictures that won't seem too daunting.

Here is one I started today as a class sample.


Only two colours - white and brown - just splodged on the canvas so far.  It will have a variegated daisy once finished done in pink and white with a brown centre.

I have put this pic up on my FB page - hopefully it will garner some interest and I can get the classes up and running.


UPDATE: Dec 2016 - no takers in painting classes :(

Thursday, August 13, 2015

long time no see - err read - or something

In case anyone actually reads this blog - my apologies for not having anything to read for the past 10 months.  No excuses, just never got around to writing anything.

I currently have the urge to give my bedroom a make over.  Last time I tried that I got the window coverings sorted - painted the original terracotta vertical blinds a lovely shade of mottled green - and sponged more green paint onto 3/4 of the walls.  The last wall was never done as there is a lot of big furniture and 'stuff' along it - the whole length of it.

Now I am tired of green and want to go white.  So far I have made covers for the blinds and put them on.  They don't sit very well at all.  The fabric - a thick white cotton damask which I quite like - wants to buckle the blades of the blinds.  So of a night we get light in.  Not so bad most nights, but when the back neighbours leave their back light on - well let's just say I may as well have the blinds completely open.

Our bed is a mattress and base.  I have just now this minute come up with a simple idea to cover the base without having a loose valance over it.  Get a fitted sheet in the required colour/pattern, take off the mattress and put said fitted sheet on the base.  Brilliant isn't it?  Why I never thought of that before I'll never know.  All this talk about making / buying a gathered valance, making sure it stays put is now redundant.  I just have to make sure I get one that has a deep enough side wall.  Manchester Department here I come.

Friday, October 17, 2014

In the middle of some sewing

I have managed to do 2 paintings.

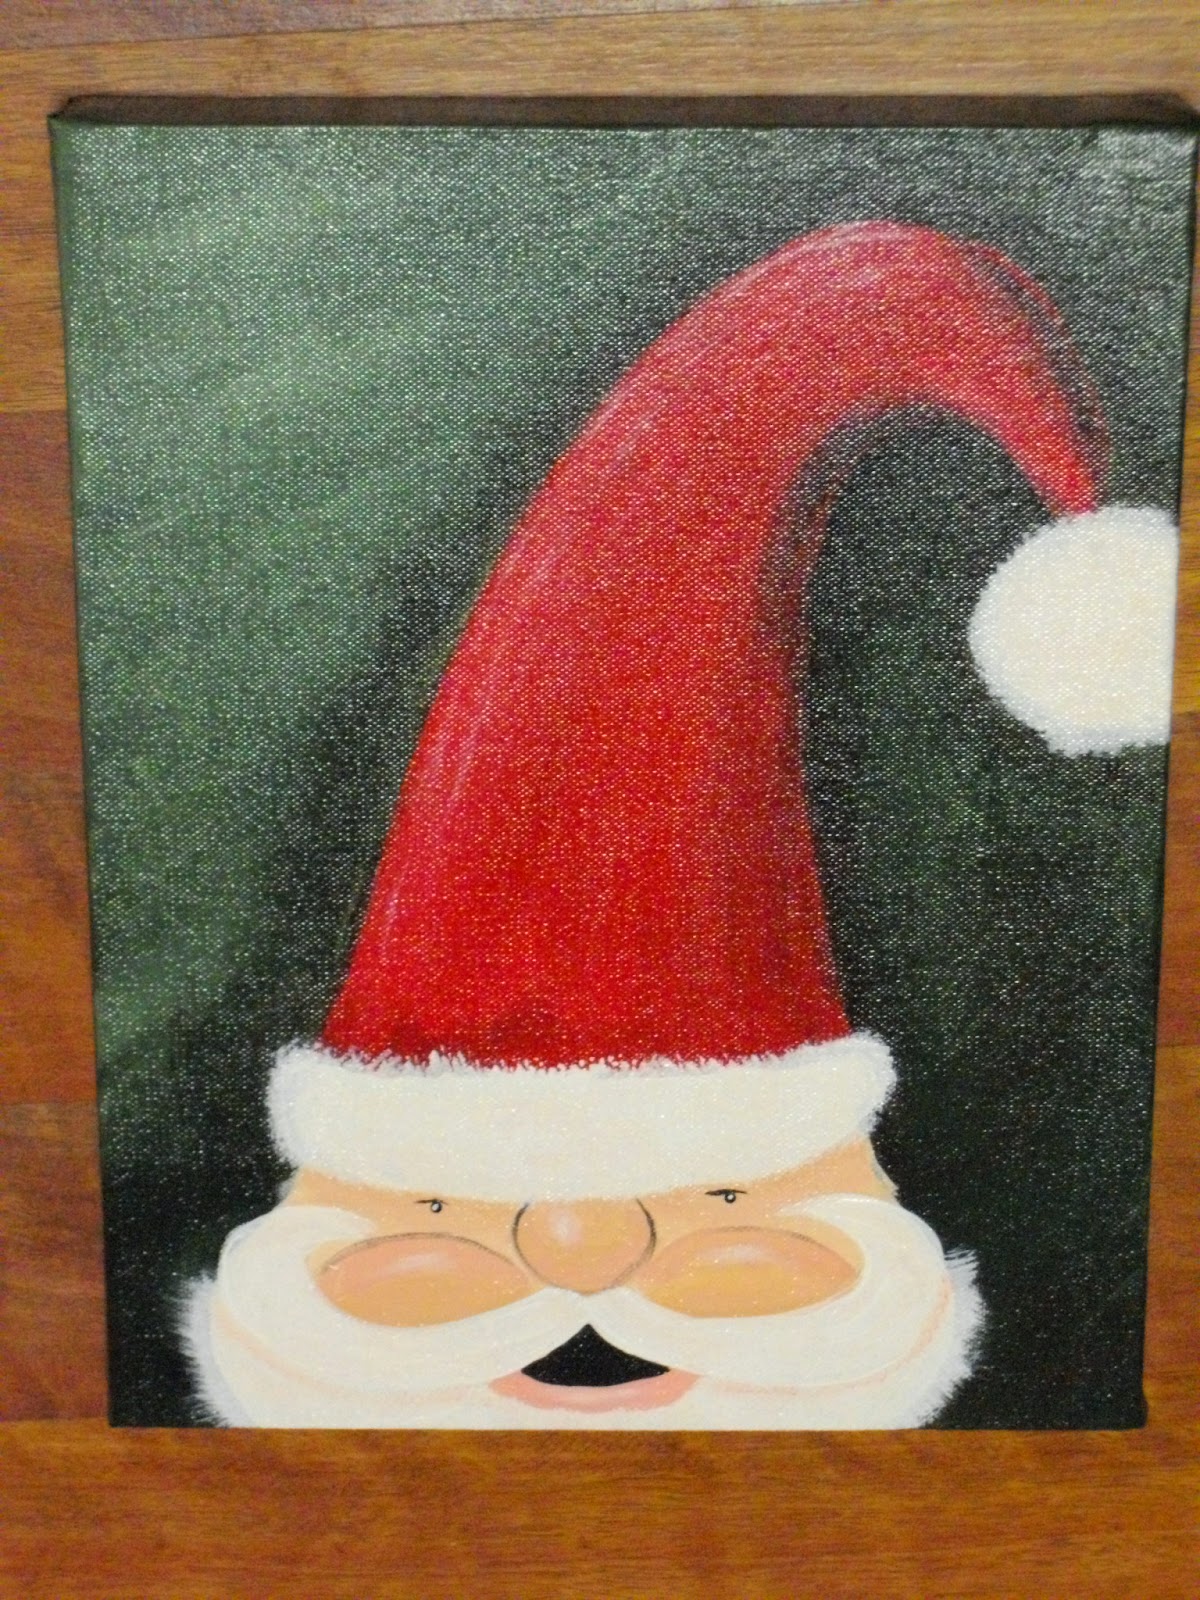
They are Christmas themed and copies of ones I have seen on the web.  But I still consider them originals - cause I made them.


This one I did first - starting out with the easiest - sorry about the glare in the pic.  It's not very large - only approx. 10" x 8".  It's companion piece is the same size.


Again more glare...  That's what I get for using gloss varnish.

This guy's face took me a couple of goes to get right, but I am really happy with the way he turned out.

They are both being donated to the cali clubs my girls are associated with as part of their concert raffle hampers.  With a bit of luck they won't be buried underneath a pile of other stuff.

On the sewing front - I have been making more Angel Gowns. 


The current wedding dress has revealed 30 angel gowns!  I am nearly finished with this lot.  I only have 10 more to sew up and then 14 pairs of bootees to knit.  Once that is all done, all that is left is to photograph each gown by itself and then as a group and send it all off back to the organisers.


I will be glad to see the end of this dress....

I have also managed to do a bit of crochet - a few butterflies as angel keepsakes as well as an angel done with 2 granny squares and some pipe cleaners (chenille sticks).


Wednesday, September 24, 2014

Angel Gowns

You may remember from my last post that I was making some Angel Gowns out of a wedding dress.  Well I have finished all the gowns from that dress - 15 in all.  Some are quite basic and others are not. 


The one below is not so basic...

 
This one below is a basic one...


This one below is my favourite.  It nearly didn't get sent back to the organisation to be sent out...


I think the lace on this one is too wide - oh well, live and learn as they say...


That one was from the front of the wedding dress.  All I had to do was cut it out at the right spot.  Some family is going to be very happy to dress their little Angel in this gown.
 
I also made up bootees for each gown in matching colours.  Some of the bootees are only 1 inch - 2.5cm - long.  Sooo tiny!
 
Now that these have been handed over I am now onto another wedding dress.  This dress had a really long train with small buttons all down it - from waist to hem.  Can you guess what some Angel Gowns will look like??

Wednesday, August 20, 2014

Sewing, sewing and some more sewing....

I got a request from a friend to make her 8yo daughter a colonial type dress for an olden days dress up at school.  Once I told her the cost to own it, I thought she was going to say that it was too expensive.  But she didn't and so I made this.....


They wanted a bonnet too, so she got this.....

 
This is her wearing it ready to go to school.


She was very excited when I dropped it off to her the night before she got to wear it. 

We decided on a hire fee due the cost to own it.  The mum has even let other mums know that I make this sort of thing to hire.  It will be interesting to see how far that goes.

I also made these the last 2 days....


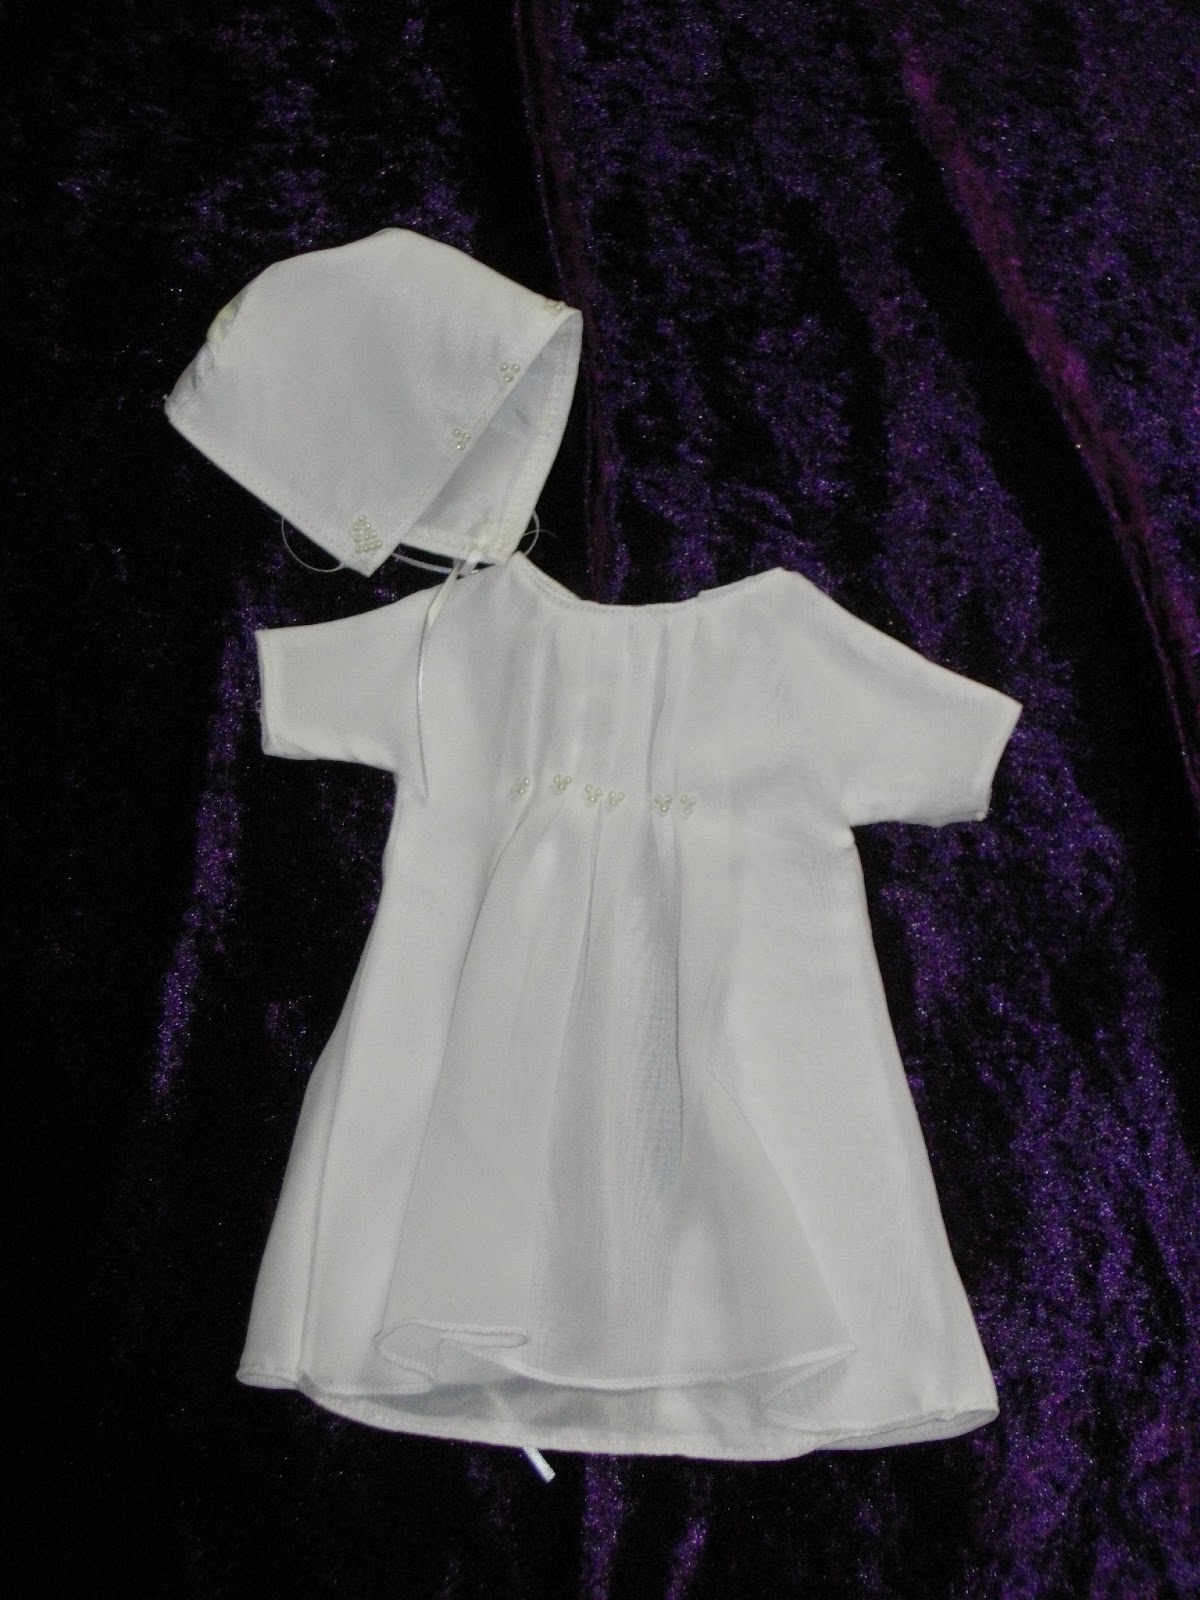
A boy's burial gown and a girls....


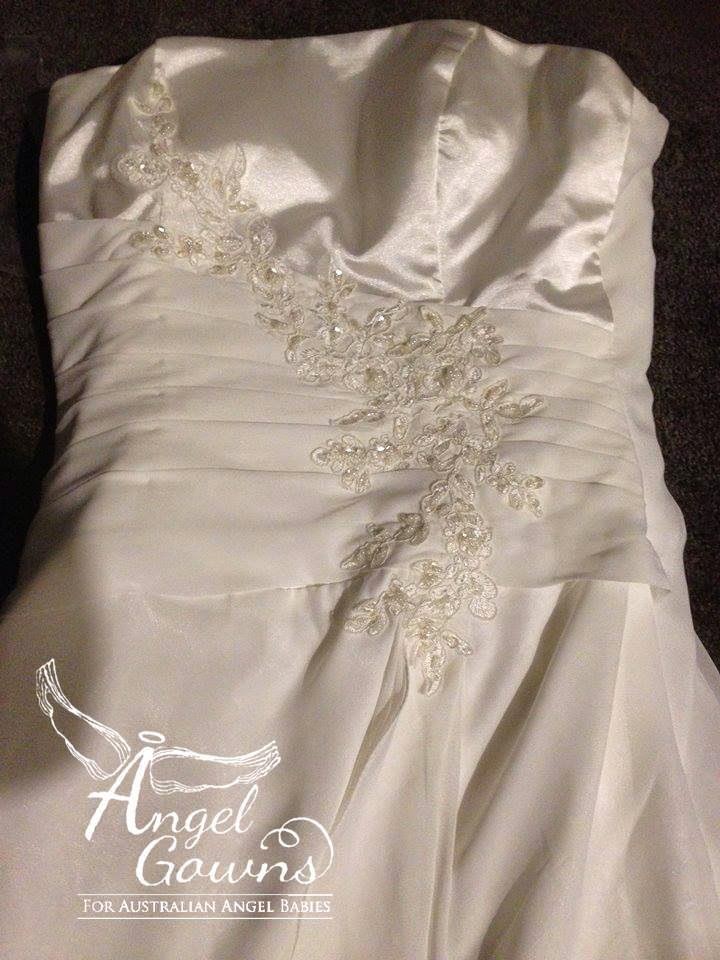
The fabric for them came from this wedding dress....


The satin is a lot finer than I originally thought so they are bit of a pain to make.  I have yet to use any of the chiffon from the dress - that will be in some more angel gowns that I will be making.  As you can see from the watermark in the last pic these are Angel Gowns for Australian Angel Babies.

I have also recently made 2 table runners for a local elderly lady.  She is going through her stash and projects and getting me to make family heirlooms. 


They are the same pattern using different fabrics.  One set of fabrics she chose, the other I chose.  I think I like the bottom one better colourwise.

I also made a costume bag for another friend - didn't take a pic of that.  That's just too boring.....


Thursday, July 17, 2014

I got the urge to Paint

again recently.  I have done some internet searches for ideas and inspiration.  Went thru my stock of canvases to see what I had - mostly large ones.  Even found my watercolour supplies (that I had yet to crack open).

There are many paintings with sayings on them around these days.  I like the idea.  It seems to be quick and fairly easy to do.  So I came up with m own.  I was a bit unsure about the underpainting at first.  I used different blues, some purples a couple of oranges and some white.  Then I added in some iridescent purple.  Whilst mixing the paints all over the canvas I did make 'mud' - oops.  That's what I get for combining orange and purple.  Oh well.  I was also unsure if the letters I had would a) stick to the painted canvas, and b) not pull of any paint when I took them off.  Luckily they didn't.  They didn't stick down very well at the edges, so there is some bleed under.  Must remember that for the next one I do. 

This is what I came up with......


  It kind of reminds me of winters first storm - snow and all.  The phrase is from a book I have been reading lately - or rather a series of books (I'm onto #2) - you can probably guess which one.

The canvas is 61cm square - a good size for this.  Now I want to do 'you are my sunshine' with a yellow top coat, 'love is in the air' with maybe a pink top coat.

Still not having satisfied my paint urge I got out the watercolours and had a play with them.  I think I like them - the paints that is not necessarily what I did with them, though the red flower is not too bad.


I have since outlined the green splotch on the petal and given it legs - now it's a bug.

I have packed all my paints away for the time being, but they will come back out soon.  I would love to be able to run paint classes from home - ones where everyone is given the same pattern and uses the same paint colours.  We'll see about this venture......

Saturday, June 28, 2014

two more finishes

Last week I finally pulled the proverbial finger out and finished off a small quilt that I started last year.  It was a Small Quilt Talk Challenge quilt - forget which month.  all I had to do was finish off appliqueing the bottom leaves on and then quilt it.  But now it is all done. 

See.....
 
 
I outlined around the border and the pot as well as around the flower.  Then I fmq'd a stipple in the white area and in the bottom pink floral area beside the pot.  I also did a couple of rows echoing the shape of the pot on the inside of it.
 
It's a bit hard to see, but here's a close up.....
 

I think it turned out ok.  Ok enough for me to then try the same fmq'ing on a larger quilt.


Here's a closer look at this one......


I did a medium stipple in all the white areas and then finished it off with a line around the inside of the black border, 2 lines down the middle of it, plus the binding turn over.  I took the excess baking and just folded it over to the front to make the 'binding'.

I must say I am really happy with the way this turned out.  Ok, I can pick fault with the quilting.  My machine didn't want to have nice tension and I broke a needle and then it kept coming unthreaded.  But I think for a first go at something like this I didn't too bad of a job.

It is being donated to Camberwell Showtime for them raffle off - either separately or as part of their silent auction night, so I hope they like it.  I used 2 different colours of grey - a light, a medium and a satin (that's the shiny stars in the pics).

The success of this gets me all inspired to drag out one of the many quilts-in-waiting and have a go on them.